Log in to WordPress to make edits as follows

Well, I’ve been away from the blog for long enough to fall foul of the introduction of 2 factor authentication, meaning I couldn’t get in to my site to make changes.

I found two approaches, the first is a way (now the only way?) of making edits on a smartphone directly within the JetPack app. What has JetPack got to do with editing WordPress I hear myself ask? Although Jetpack is the new preferred method, its introduction is far from intuitive, given the lack of WordPress branding, unless of course you simply get used to it by using it all the time.

The second way of logging in is to open the WordPress.com website and when prompted to enter a code. Forget about using the text me the code option as nothing happens. Instead go to smartphone and open the Google Authenticator. On opening the app, it was ready with the code, which was then typed into the WordPress requested field on desktop. I was in at last.

I clearly must have set up these two methods and with so much time away and therefore lack of practice, I’d clean forgotten these new methods. I was clearly still recalling the original method of logging into the WordPress.com website. A case of old dog, new tricks.

Generic Photography versus Conceptual Art Photography

To me the course “Digital Photography: Discover your Genre and Develop your Style” is at variance with Conceptual Art Photography.

Research

At Annex A, the proposed method of developing photographic practice for a conceptual art photographer seems comprehensive, covering a range of photography genres. However, there are several areas where it could potentially be improved and refined to better align with the needs of a conceptual art photographer.

  1. Conceptual Focus: The focus on ‘Things’, ‘People and events’, and ‘Environment’ is too broad and could be more concept-driven given the audience is conceptual art photographers. It’s worth noting that conceptual art photography isn’t about the subject per se, but about the concept or idea behind the artwork. It could be more beneficial to focus on exploring themes, symbols, narrative structures, and the theoretical underpinnings of conceptual art.
  2. Abstract Elements: The plan seems to lack the mention of abstract or non-literal photographic techniques. For a conceptual photographer, the ability to create and manipulate abstract elements in photos is essential. This can include techniques such as multiple exposures, motion blur, use of lights and shadows, color theory, and digital post-processing techniques.
  3. Critical Theory and Context: It’s crucial to understand the wider context and critical theory that surround conceptual art. For example, the understanding of semiotics, the study of signs and symbols, is paramount in conceptual photography. The plan should include elements of art history, philosophy, and cultural studies to provide a deeper understanding of the context in which the photographer is working.
  4. Storytelling and Concept Development: There seems to be no explicit mention of developing storytelling skills or learning to create and develop concepts. Conceptual photography often has a strong narrative or idea behind it. Developing skills in conceptualizing ideas and turning them into compelling visual narratives should be a part of the plan.
  5. Review and Critique: A key aspect of developing as a photographer is receiving feedback on your work. Incorporating peer reviews, critiques, and discussions can help photographers learn from each other’s strengths and weaknesses.
  6. The Business Side of Photography: The practical business side of photography seems missing. Topics like copyright, marketing, selling art works, or developing a portfolio and online presence would be beneficial for aspiring professional photographers.

To summarise, while the current plan provides a broad base of genres, for a conceptual art photographer it might be more beneficial to focus less on the specifics of each genre and more on developing skills in concept creation, storytelling, abstract elements, critical theory, and professional practices.

As for Critical Theory I expand on this a bit more:

Critical theory in the context of art and photography refers to a range of theoretical and philosophical perspectives that seek to understand, interpret, and critique art and culture. Here are some of the key aspects of critical theory for the conceptual art photographer:

  1. Semiotics: This is the study of signs and symbols and their use or interpretation. In photography, semiotics can be used to analyze and create images that communicate specific ideas or concepts.
  2. Postmodernism: This theory criticizes modernist ideals and encourages questioning of grand narratives and ideologies. It often involves the deconstruction and analysis of images, exploring how they reflect or subvert cultural norms and power structures.
  3. Psychoanalysis: Concepts from psychoanalysis, such as those developed by Sigmund Freud and Jacques Lacan, can be used to explore themes of identity, desire, and the unconscious in art.
  4. Feminist Theory: This theory examines gender inequality and the social and political structures that perpetuate it. In the context of art, it might involve critiquing the male gaze or exploring the representation of women and gender roles.
  5. Marxist Theory: This theory involves the critique of capitalism and the exploration of class structures and struggle. In art, it might involve a critical analysis of the art market or the commodification of art and images.
  6. Post-colonial Theory: This theoretical perspective deals with the effects of colonization on cultures and societies. In art and photography, it might involve exploring themes of identity, race, and power dynamics.
  7. Queer Theory: Queer theory focuses on sexuality, challenging the heteronormative structures of society. In art, this could mean exploring non-normative sexualities and genders, and challenging traditional representations.

Incorporating these theories into the study of photography can provide a deep understanding of how images are created, interpreted, and received. They can offer valuable tools for conceptual art photographers who wish to create thoughtful and challenging work.

General

The Open University (OU) course is similar to and supersedes other online course materials, TZFM200 in particular. The described approach simplifies the topic of genre selection and style development. This presumably allows the photographer who is growing in confidence to connect which you might think is good. However, the 10 weeks is spread over the busy summer holiday period which can be a logistical challenge. But then it is not so easy to complete the course by the time the assessment comes around, That is unless one is super clear about creating a statement of intent (SOI) and following it through while doing a substantial edit that leads to 12 really good photographs that fit the SOI brief.

Annexe A

Here is the marketing information from a new Open University course delivered by FutureLearn in partnership with the RPS:

https://www.futurelearn.com/microcredentials/digital-photography-discover-your-genre?utm_source=Iterable&utm_medium=email&utm_campaign=fl_marketing&utm_term=230627_MIC_TAR_EXTENDED

Digital Photography: Discover your Genre and Develop your Style

Explore different photographic genres, styles, and approaches

Created in collaboration with the UK’s leading photography organisation, the Royal Photographic Society, this microcredential will give you a broad overview of a number of photographic genres and the knowledge, skills, and techniques to create better photographic narratives.

Build your photography skills and learn how to work to a brief

This course will encourage you to explore different areas of photography to help you identify where you want to develop your creative photography skills, confidence, and knowledge.  Some of the subjects covered in this course include:

  • ‘Things’ – including product and food photography
  • ‘People and events’ – exploring portraiture, sports, and photojournalism
  • ‘Environment’ – looking at wildlife, buildings, architecture, and landscapes

You will learn how to work to a brief and how to prepare and take images to create a body of work within these subjects that tell a visually cohesive story. You will discover how your approach to taking or displaying an image can affect how it is understood and explore the conventions related to particular genres.

Develop a photography project that realises its intent

Building on your basic photography skills, you’ll start to understand what it means to be an intentional photographer as well as how to think about and write a Statement of Intent that explains the purpose and objective of your portfolio.

This course is delivered on the FutureLearn platform and you will also access Behance, a third-party image sharing site by creating a free account. This site is used to share your images with co-learners and develop your photographic eye by learning and practising how to give feedback on each other’s images.

Learn from experts, with The Open University and the Royal Photographic Society 

Created by The Open University in collaboration with the Royal Photographic Society, you’ll learn from current thinkers and experimenters who specialise in particular genres and approaches to photography.

Throughout the course you’ll take part in weekly activities to support and consolidate your learning. You will share ideas and experiences with co-learners, building skills, confidence and knowledge from peer to peer feedback and weekly challenges to experiment and explore your new creative approaches, techniques and practices, and the concept behind your intent.

At the end of the course, you’ll submit an assessment which is marked and graded by academic experts from The Open University. The assessment requires you to submit a set of 12 images and a statement of intent. You will also be required to show how you have worked with others in the group, evidencing feedback on other students’ work.

The FutureLearn social learning experience is designed to encourage learners to interact and benefit from a stimulating learning community. On-course mentors encourage collaboration between learners and offer guidance. Feedback on images throughout the course will come from your co-learners. After you’ve completed the course you’ll receive detailed, personal feedback on your assessment from academic and subject matter experts.

This course replaces Digital Photography: Creating a Professional Portfolio (OU course code: TZFM200.) It is a completely new course, however the assessment is similar in shape and level. If you have any questions, please contact us prior to enrolling.

What skills will you learn?

  • Genre specific field skills
  • Critical reflection 
  • Visual awareness
  • Researching and working to a brief
  • Giving constructive feedback

The Academic Blog

“Michael Turner CRJ,” is a platform where I share my journey and experiences in the world of photography and visual arts. I discuss various topics related to photography, including different techniques, reflections on my work, and reviews of other photographers’ work.

In my blog, you’ll find different sections:

  1. MA in Photography: Here, I share my experiences as I pursue a Master of Arts degree in Photography. I reflect on my coursework, discuss my assignments, and share my thoughts on the overall learning experience.
  2. Photographers: In this section, I review and discuss the work of various photographers. I reflect on the techniques they use and how their work influences my own photography.
  3. Techniques: This is where I discuss various photographic techniques. I share my experiences in trying out these techniques and reflect on their effectiveness.
  4. Reflections: Here, I reflect on my own work. I discuss my thought process in creating my photographs, the challenges I face, and the lessons I learn.
  5. Research & Reading: In this section, I discuss various research materials and readings related to photography. I reflect on books, articles, and other resources that I find helpful in my study of photography.

I regularly update my blog with new posts and encourage interaction through comments.

Exploring the Intersection of Photography and Computed Visuals with Processing: An Experiment with mtDNA and Animated Teeth Narration

Combining photography with computing can lead to some exciting and innovative visual experiences. One way to achieve this is through the use of Processing, a programming language that allows for the creation of dynamic and interactive visuals. As part of my FMP research, I have been considering the use of Processing in connection with my photography, specifically around the topic of mitochondrial DNA (mtDNA).

Mitochondrial DNA is a type of DNA that is found in the mitochondria of cells and is passed down maternally. This type of DNA can be used to trace ancestry and is also important in understanding genetic diseases. By combining photography with dynamic visualizations of mtDNA, I hope to create a unique and engaging experience for viewers.

To achieve this, I plan to add a layer of computed visuals to my photography using Processing. One possible approach could be to create an animated representation of mtDNA that responds to user input, allowing viewers to interact with the visualizations in real-time.

In addition to using computed visuals, I also plan to incorporate animated teeth as a narrator in my project. To accomplish this, I will be reusing code from an earlier course on Processing. The code for the animation is shown below:

float toothY = 0;
float toothDir = 1;

void setup() {
size(400, 400);
noStroke();
fill(255);
frameRate(45);
}

void draw() {
background(0);

// Update the tooth position
toothY += toothDir * 5;
if (toothY < -30 || toothY > 30) {
toothDir = -toothDir;
}

// Draw the teeth
pushMatrix();
translate(width/2, height/2 – 60 + toothY);
scale(0.5);
drawTooth(-80, -20, 30, 60);
drawTooth(-40, -10, 20, 50);
drawTooth(0, 0, 20, 40);
drawTooth(40, -10, 20, 50);
drawTooth(80, -20, 30, 60);
popMatrix();

pushMatrix();
translate(width/2, height/2 + 60 – toothY);
scale(0.5);
drawTooth(-70, 10, 20, 40);
drawTooth(-30, 20, 20, 50);
drawTooth(10, 20, 20, 50);
drawTooth(50, 10, 20, 40);
popMatrix();
}

void drawTooth(float x, float y, float w, float h) {
beginShape();
vertex(x-w/2, y);
bezierVertex(x-w/2, y-h, x+w/2, y-h, x+w/2, y);
vertex(x+w/2-w/5, y);
vertex(x+w/2-w/5, y-h/2);
vertex(x+w/5, y-h/2);
vertex(x+w/5, y);
endShape(CLOSE);
}

This code creates a simple animation of 10 teeth that move across the screen from left to right. To run this animation on Mac OS, you will need to download Processing version 4 from the Processing.org website. Once downloaded, simply copy and paste the code into a new sketch and click the “play” button to run the animation.

Mitochondrial DNA Example Sequence

While my own DNA has been decoded, I cannot share the actual coding due to privacy concerns. However, I have used a mitochondrial DNA sequence as an example in a photograph of my paternal grandmother, as part of a project to trace my father’s ancestry. I plan to create similar visualizations using antique photographs of my maternal grandmother and great-grandmother from my family photo collection.

GTGCTGATCACAGGTCTATCCTGACCTGGCCGAGCAGGAGAGCCTCTGCAACCCGGGAGGCGGGAGCATTGATTAGCTCACTAAACCCCCGCCCTCAGCCTACTTAAATTTAATTAAGCCATCGGCGCACGGTCTTTTATTAGCTCTAGTCAAAACTAAAGAGGGTTCGCTTTAGCCACACTGGGAGTGGATCACCCGTTCTCTACTAAAGTGTGCCGGGGGAGGAGCCTGTTATTT…

There are different methods to create the desired type of image. In Photoshop, one approach is to write the letter sequence as text attached to a marked-up line, which could be spiral in nature. Alternatively, a simple layer could be added to an antique family photograph. Another option is to use Processing to run a program that generates an image from the letter sequence, such as Text2Image.

The latter was implemented and is the more sophisticated visually. Text size and colour is varied to produce a form of typewriter art. Experimentation with parameters was clearly necessary from a previous implementation which was either too crowded with text or too sparse. I need to find the happy medium.

The more sophisticated approach for creating the image was through Processing’s Text2Image program, where the text size and color can be varied to produce typewriter art. However, experimentation with the parameters is necessary to find the right balance. In a previous implementation, the image was either too crowded or too sparse with text, so I need to find the sweet spot.

By combining computed visuals with my photography and incorporating animated teeth as a narrator albeit quite basic until further refined., I hope to create a unique and engaging experience for viewers that explores the topic of mitochondrial DNA in a new and exciting way.

Unleashing the Power of a 400 Megapixel Mirrorless Camera: Exploring Print Sizes and Image Enhancement Techniques

The available mirrorless camera has a maximum resolution of 8192 x 5464 pixels, which translates to approximately 29 x 19 inches at 300 pixels per inch (ppi) when printed.

In 400 megapixel mode, the camera captures a series of images and then combines them into a single high-resolution image with a resolution of approximately 16,384 x 10,922 pixels.

Assuming a print resolution of 300 ppi, the largest physical print size possible from the camera in 400 megapixel mode would be approximately 55 x 36 inches. However, it’s important to note that the exact print size achievable may depend on factors such as the printing technology and viewing distance, and the final image may need to be downscaled or cropped for optimal quality.

Using Topaz Gigapixel AI the image height can be extended x6 to 330 inches which is now too tall for exhibiting. At a height of 1.85 metre / 55 inches the multiplier doesn’t need to be x6, Nearer 1.3 (1.324) would suffice especially when the print wouldn’t go to floor level.

Update on making immersive test prints on an Epson 180 / 360 ppi A2+ printer:

Assuming a print resolution of 300 ppi, the largest physical print size possible from a camera in 400 megapixel mode would be approximately 55 x 36 inches. However, to refine the size for an Epson printer that operates at 360 ppi, we need to adjust the calculations. If you’d like to print at a larger size without noticeable loss of quality, 180 ppi can be used.

First, let’s calculate the maximum print dimensions at 360 ppi: To calculate the dimensions, we need to know the pixel dimensions of the 400-megapixel image. Assuming a 4:3 aspect ratio, a 400-megapixel image would have dimensions of approximately 23200 x 17400 pixels.

At 360 ppi: Width: 23200 pixels / 360 ppi = 64.44 inches Height: 17400 pixels / 360 ppi = 48.33 inches

So, at 360 ppi, the largest print size would be approximately 64.44 x 48.33 inches.

Now, let’s calculate the maximum print dimensions at 180 ppi: Width: 23200 pixels / 180 ppi = 128.89 inches Height: 17400 pixels / 180 ppi = 96.67 inches

At 180 ppi, the largest print size would be approximately 128.89 x 96.67 inches.

However, the available printer can use roll paper but has a maximum width of 17 inches. To print the maximum size, you would need to print the image in strips that could be joined together side by side to achieve the maximum resulting print width required.

At 360 ppi, you would need to divide the width (64.44 inches) by the maximum printer width (17 inches): 64.44 inches / 17 inches = 3.79 strips (round up to 4 strips)

At 180 ppi, you would need to divide the width (128.89 inches) by the maximum printer width (17 inches): 128.89 inches / 17 inches = 7.58 strips (round up to 8 strips)

So, you could print the image in 4 strips at 360 ppi or 8 strips at 180 ppi and then join them together side by side to achieve the maximum resulting print width required.

Challenging Photographic Image Size: Revisiting the Potential for Large-Scale Prints

The world of photography has come a long way since the inception of my photographic practice. From the traditional use of film to the advent of digital photography and mirrorless bodies, the technology has advanced by leaps and bounds. One such advancement that may revolutionise my stills based photography is the ability to capture high-resolution images. However, this was not the case in my practise until a recent development in mirrorless DSLR in body stabilisation IBIS introduced the capture of 400Mp images.

In the past, photographic image size was limited, and my preference was for low-resolution capture to enable smooth operation of my creative post processing workflow.

This was primarily due to the economic limitations of technology at the time. Affordable pro DSLR cameras were not capable of capturing high-resolution images. In the latest firmware release the mirrorless DSLR can. The cost of processing and printing high-resolution images was prohibitively expensive. The latter may still be the case except with a resolved body of work there is less risk of repeated iterations of the expensive process.

Despite the former limitations, I was able to create abstract works of art up to A4 size. I relied on my creativity and the ability to manipulate the image in post-processing to produce the results. In fact, like some other photographers we preferred the low-resolution capture as it allowed us to produce a more dream-like, painterly effect.

However, with the advent of digital technology, the limitations of photographic image size have been largely eliminated. High-resolution images, such as the 400Mp technology, became available in a recent firmware exploitation of IBIS control as mentioned.

When combined with tools such as Topaz Gigapixel, which uses AI to increase the resolution of images up to six times, the possibilities for creating large-scale prints should now be possible within my practise

This development has challenged an earlier decision to limit photographic image size. For example, in the past, A4 prints were considered large enough for most purposes. However, now the potential for creating extremely large prints is possible, with the ability to create prints the size of a house door. I will proceed to confirm the technical details allow this or at least find out the new maximum limits.

Some of my earlier work incorporated hand-drawn vector graphics which would scale if I reintroduced these ideas which I really enjoyed making.

The decision to revisit the intention from 2019 to produce work on the scale of Marc Rothko’s as immersive “Art as an Experience” now seems practical with the techniques now available here. The potential for creating large-scale prints that allow the viewer to stand close and experience the work on a visceral level is exciting. This is particularly true for photographic works that capture the beauty of the natural world of the human healing experience.

In conclusion, the advancement in photographic technology has challenged the traditional limitations of photographic image size. The potential for creating large-scale prints that allow the viewer to experience the work on a visceral level is exciting. The decision to revisit the original intention to produce work on the scale of Marc Rothko is a logical one, as it allows the creation of immersive art that can be experienced on a grand scale.

A revisit to colour at large scale: 2:1 prints around 72’ tall through newly available high resolution techniques

Renewed Design Interest in Building out My Gallery Space

Hello there! I am excited to share with you that I am restarting work on the 3D model of my studio space for my Exhibition. As you may know, I created the 3D model as part of my Masters Final Major Project back in 2020. Since then, I have not had the chance to work on it, and my SketchUp skills have become quite rusty. Therefore, my main objective in revisiting the 3D model is to reacquaint myself with the SketchUp tool and improve my skills.

One of the tasks I need to do is to add my exhibition photographs to the pre-existing virtual display/exhibition frames. This will enable me to showcase my work and share it with others virtually. However, I need to find some learning resources to help me get back up to speed with SketchUp.

To this end, I have scoured the internet and found a range of useful resources, from YouTube videos to SketchUp courses. I thought I would share these resources with you so that you too can benefit from them.

Firstly, I found a series of SketchUp tutorials on YouTube at this link that are perfect for beginners. These tutorials cover everything from the basics of navigation to more advanced features such as 3D modeling and rendering. The tutorials are easy to follow, and the presenter explains things in a clear and concise manner.

Secondly, I discovered a range of SketchUp courses:

SketchUp Campus

SketchUp Fundamentals with set of Exercise files

These courses cover a range of topics, from the basics of SketchUp to more advanced features such as using plugins and extensions. What I like about these courses is that they are self-paced, so you can learn at your own speed.

Lastly, I came across the SketchUp website itself, which has a range of learning resources available. They offer a range of tutorials, videos, and webinars, covering everything from the basics to more advanced topics.

I am excited to dive back into SketchUp and improve my 3D modeling skills. I hope this post has been helpful in pointing you towards some useful resources for learning SketchUp. Whether you are a beginner or an experienced user, there is always something new to learn. Happy modelling!

Hauntology

I extended research in a number of directions to include a self made music piece following a visit to the University of Westminster in December 2019 and attendance at basic instruction on creating music with GarageBand in the nearby Apple Store. This composition was in a Hauntology style and recently in expression has evolved. I also created a video using iMovie that by now is due an update with a refresh of the images used, Parked still are a number of my processed ghost images that have never been shown outside of my course. All of these mediums: sound, video and visual extend somewhat eerily into the realm of Hauntology.

Of Phenomenology and Hauntology

Hauntology is a range of ideas referring to the return or persistence of elements from the social or cultural past, as in the manner of a ghost. The term is a neologism first introduced by French philosopher Jacques Derrida in his 1993 book Specters of Marx. It has since been invoked in fields such as visual arts, philosophy, electronic music, anthropology, politics, fiction, and literary criticism.

“Hauntology” originates from Derrida’s discussion of Karl Marx in Spectres of Marx, specifically Marx’s proclamation that “a spectre is haunting Europe—the spectre of communism” in The Communist Manifesto. Derrida calls on Shakespeare’s Hamlet, particularly a phrase spoken by the titular character: “the time is out of joint”. The word functions as a deliberate near-homophone to “ontology” in Derrida’s native French.

Derrida argues that Marx’s ideas are still relevant today, even though he died in 1883. He writes that Marx’s ideas “haunt” us, in the sense that they are always present, even if we are not always aware of them. Derrida also argues that Marx’s ideas are not simply a matter of the past, but that they have the potential to shape the future.

The concept of hauntology has been used to explore a wide range of issues, including the relationship between the past and the present, the nature of memory, and the possibility of social change. It has also been used to analyze a variety of cultural phenomena, such as the rise of nostalgia, the persistence of colonialism, and the return of fascism.

Hauntology is a complex and challenging concept, but it is also a powerful one. It can help us to understand the past, the present, and the future in new and unexpected ways.

Week 1 Technological Modernity (as applied to Photographic Practice)

This item has been moved to the Contextualisation blog

Apologies for that. I’m trying to instil a greater degree of order and finding it quite a challenge as (with any filing system, and this blog is a document filing system) one item might store in two locations. Ultimately it is better if readers can find stuff.

This has happened following discussion amongst fellow students at the new session Module Leader Group Tutorial. Having said that we have three Alumni visiting next week to talk and specifically mention about organisation

Week 11: Art and Commerce

We’ve entered a busy time with several work items in progress.

Portfolio

http://bit.ly/2QojUIa

A portfolio of images has been submitted. The challenge this time has been to create a consistent look to the set. The portfolio has dropped close-up photographs this time and only abstract images are present. This gives greater consistency as does adopting a square format throughout.  

Abstract presents a challenge in maintaining narrative. The way I’ve gone about tackling this is to display on a single line. This way control is maintained of viewing sequence where a grouping would allow a potentially clash.

What I decided was to place images inline in groups of three with a blank tile punctuating the sequence. This gives scope to introduce a rhythm as in a poem or song.

The next decision was to use captions and I decided on a call and response method which with some repetition adds to the narrative. When assembling my work I decided also to read the captions and record as an audio track added to a screen version of the images. This proved quite powerful and attracted someones attention.  attention of  is something I’d like to explore as an installation.

As the abstracts are predominantly red, when printed I was able to tune the room lighting and in doing so noted a dynamic was introduced, a perceived movement within the images. This is something I’d take further with an installation and I’ve not discovered the impact without doing my own printing (calibration required control of the lighting).

Oral Presentation

http://bit.ly/2QojUIa

Over the summer an unplanned change of platform took place and so a new set of tools were adopted for this production task. Regardless of the software being much easier to use, it is still distracting learning new controls whilst constructing a new workflow. Nevertheless is was a surprisingly enjoyable experience and apart from a few stumbles over my words during recording the process went relatively smoothly. 

A benefit of the MA Photography course in having these assignments is that time is available to consider and review the content and this enhances motivation. As usual it is difficult to get it spot on throughout this process. I detect other students have similar experiences. As the deadline approaches, it is towards the end that I find I force the issue and make a late breakthrough.

My thinking had been challenged throughout as I needed to simplify. There were several strands running together that ranged in degree of difficulty to resolve and present. It is necessary to communicate at the level an audience will engage with. The breakthrough emerged and yet I was rather nervous of falling into a trap – sometimes authors wax lyrical about their work in ways that just don’t match up to the reality.

So with trepidation, I began to unwrap the whole thing and got it down to a base level I’d hope others could engage with. The motivation for my work is expressed more clearly as a transformation of childhood experiences of family culture into a more rounded adult view. When those around me engaged me in conversation as a child, I understood as a child. As an adult I can recognise the gaps and begin to use existing knowledge to expand out into the gaps. As an adult, I can also begin to create visual references that help complete my understanding of their experiences including loss unspoken.

In the process I took onboard the comments received in review. I’d like the work to be perfect but realise I’m learning and hopefully improving the strength of the portfolio work in each module. 

One thing I’m happily surprised about is the consistency of the subject. I could so easily have wavered onto some other branch of work. However, I still feel it is my destiny somehow to complete the work and so that has eased the decision making. Support from a wider family has been immense as they connect emotionally with the work and love to see the images I made and now make. In this respect the work is gaining traction with requests starting to come in from them for selected copies of the work. Although I cannot charge them for the work, I asked one to give to charity a small amount for each print they make.

Printing – is so important

Printing loomed large as a big thing. I was printing successfully before the summer but it all fell away with that change of platform. Software compatibility issues and default installations had held me back even after attempting to calibrate end to end. I took out the weekend before last to investigate what was behind such dark colour prints and I resolved it on my own. It was a manufacturer caused problem but with dogged determination it was solved. Now the abstract pictures that glow on screen print in entirely the same way on paper! I’m really pleased with the results and totlly enjoy getting back to tangible manifestations of my work.

Tutor advice to a student was taken onboard. I can now handle, order and re-order the prints, write on the backs, and basically enjoy them. I feel that print and more to the point, control over the print workflow will become increasingly important as the MA Photography course progresses. I kind of knew that but it is exciting to get back on the printing track. Watch this space.

Development – Project

Week 5 to Week 12

Developments were made in different areas of the project: Print, Macro/Microscopy, End to end image file management, Post improvements in technique, Colour Calibration and Colour Management. I planned to work on colour and have started to make inroads now that I routinely measure colour as standard practice. I now make custom filters to add or remove casts. There is more to do as are there are other methods. There has to be a purpose and for me it is to build consistency across a portfolio, to pull images towards a signature direction. That is coming along.

I also questioned rectangular (square) framing and developed a method of more directly guiding the gaze. I’m not happy yet with this as a widespread effect The idea was bubbling away and I was waiting for an opportunity to reframe like this and when I chanced upon the work to Ellen Carey I decided to act. Carey reframes as a result of the Polaroid push pull method and creates an attractive surf board look in some of her (colour) monochrome prints. So far I’ve opted for a sort of keyhole kind of approach, but having developed the technical method that scales (photographing and tracing in Illustrator and passing the result as a layer into post), then it is down to homing in on a durable style. It can even derive from freehand sketching rather than starting with the making of a frame photograph. There are two examples in my portfolio:

http://bit.ly/2Rz706q

Narrative development has also taken place. Abstracts in my portfolio are displayed in a line to prevent overload or clashing of images. The metaphor I heard in tutor group meetings was of poetry or song or from writing punctuation. I went ahead and as a start now group in threes with white tile rests. That tackle visual narrative.

A further development designed for impact is call and response captioning which can be seen in my portfolio. Repetition in the captions helps narrative and as a trial I recorded an audio of the captions and it begins to add drama as it starts to drive the images along in slideshow. 

I’m surprised how much this has come along. I still work with stage 1 abstract and stage 2 abstract and overall, it is still down to developing further skill and judgement basically through practice.

The personal nature and physical inaccessibility for the subject matter led to trial of smartphone camera (clip on lens), articulated mirrorless bridge and DSLR with auto focus bracketing. I want to use the latter for quality but the smartphone versatility wins out consistently. I don’t really want to have a smartphone based portfolio if it can be helped. Practical considerations constrain though. There are techniques for smartphone use that can be improved get the results I’m looking for in an image before I abstract it in the now usual way.

Week 4

Work diverted off into a minor project and freed up my thinking for a short while. This was much appreciated, having been focussed so intensely on my main work abstracting images of which more below too.

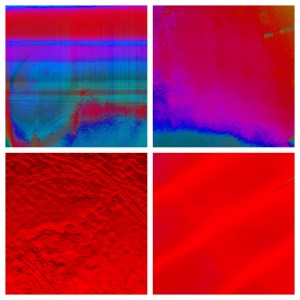
Microscopy Experiment

Short Project

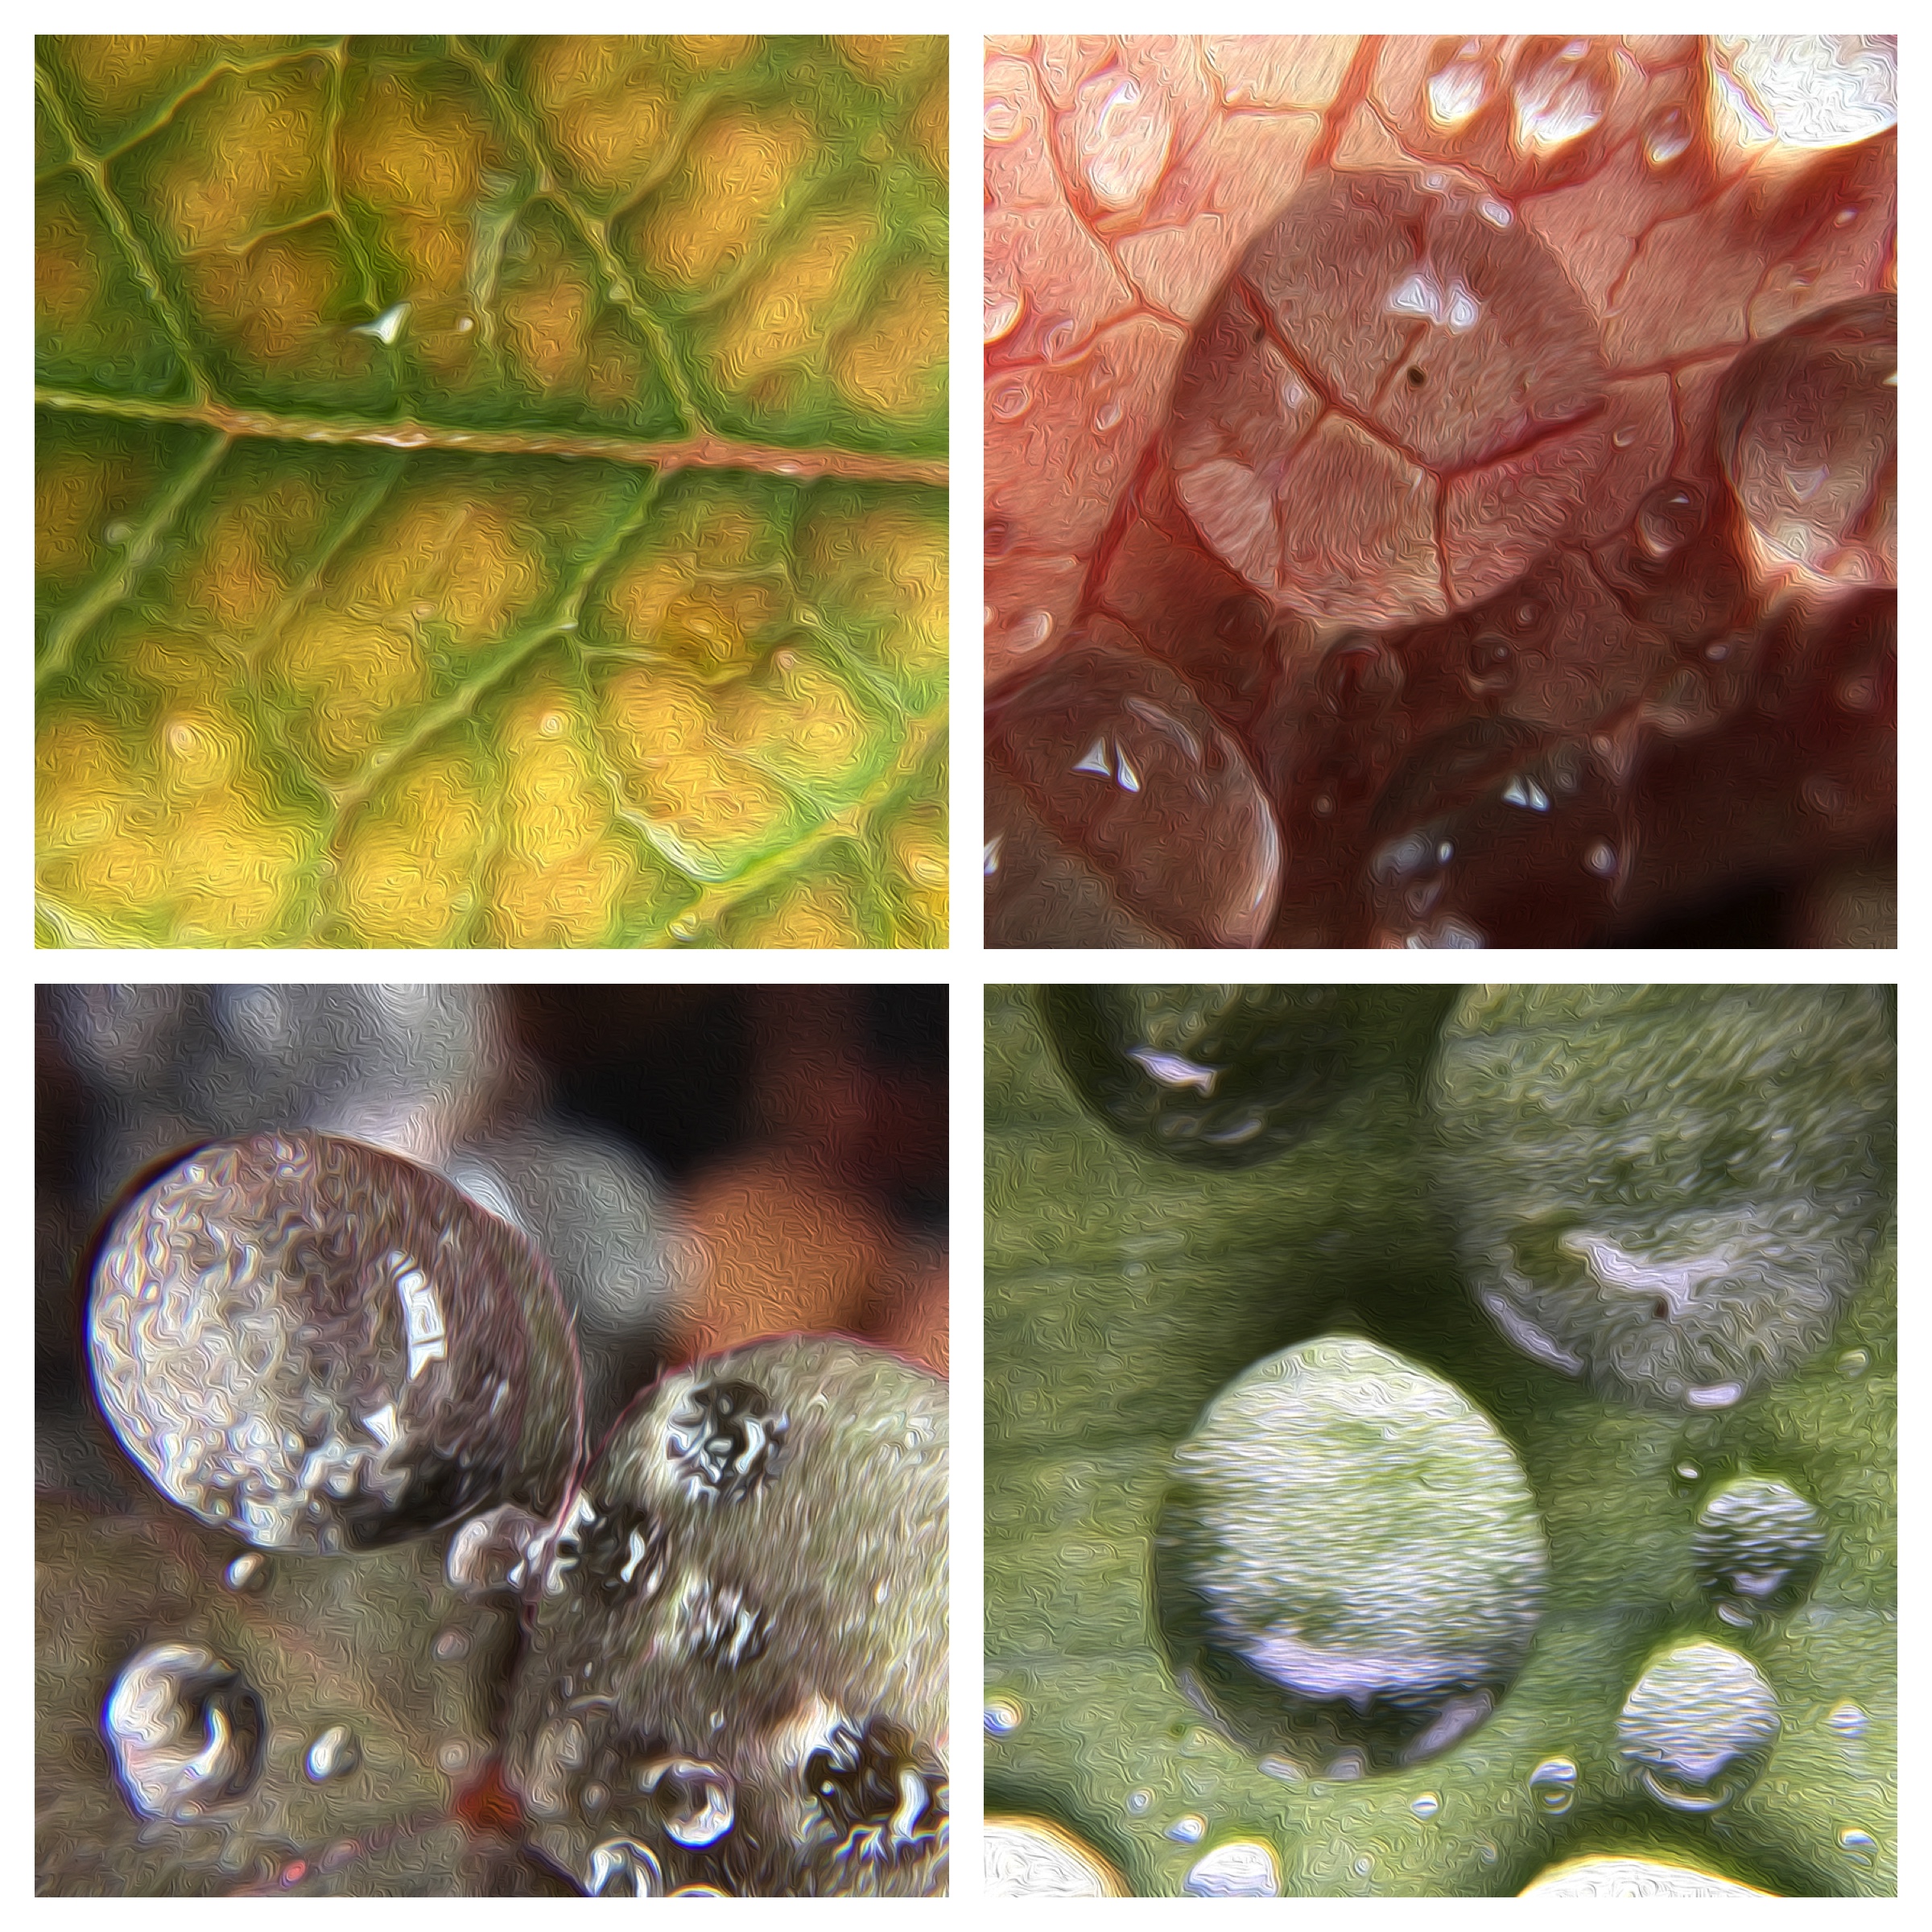
Fig W4 – 1  Microscopy project

I’d intended to work in the garden in a certain way expecting to create long exposure images. So much for having a plan in the end though. I was influenced by a commercial course I reviewed for the Studios and Training Centre where I hang out as Studio Manager.

After some test shots I changed tack to microscopy instead.

I was surprised by how working freely allowed intuition to take over. It pulled together a number of strands of practice.  After a recent period of abstracting I felt the need to shoot straight images for a while if only for some relief. Photography has to be fun at least at this stage and hopefully later in time too.

A chat I had during the summer at the Institute of Photography at the Penryn Campus hinted towards microscopy. This was arrived at through my discussing Cellular repair  and DNA. I wasn’t thinking scanning electron microscope so much as solving the more  practical consideration of print size for small areas of physical trauma abstracted.

Technique thus moved over to a smartphone fitted with a x15 clip on lens. I practiced this with much joy using: a x15 magnification lens combined with x10 optical zoom along with a method of steadying and remote release and I was good to go. I’ve stuck with x1 optical for now as it gives enough magnification for my purpose.

As for the results, well you can see above.

Working outdoors at high magnification and in a breeze was a technical challenge and the images were medium / good quality. It made sense though to add an oil filter effect in post as a sympathetic treatment. This too helped to further tie together the images as a set. In terms of my practice this represented progress in gaining a consistent set of photographs.

I could have diverted for a lot longer to gain a much more extensive catalogue to create a body of work. Mindful of time I stopped. I had what I wanted. As the season continues to change the source subject material has now drifted towards decay with the approaching winter.

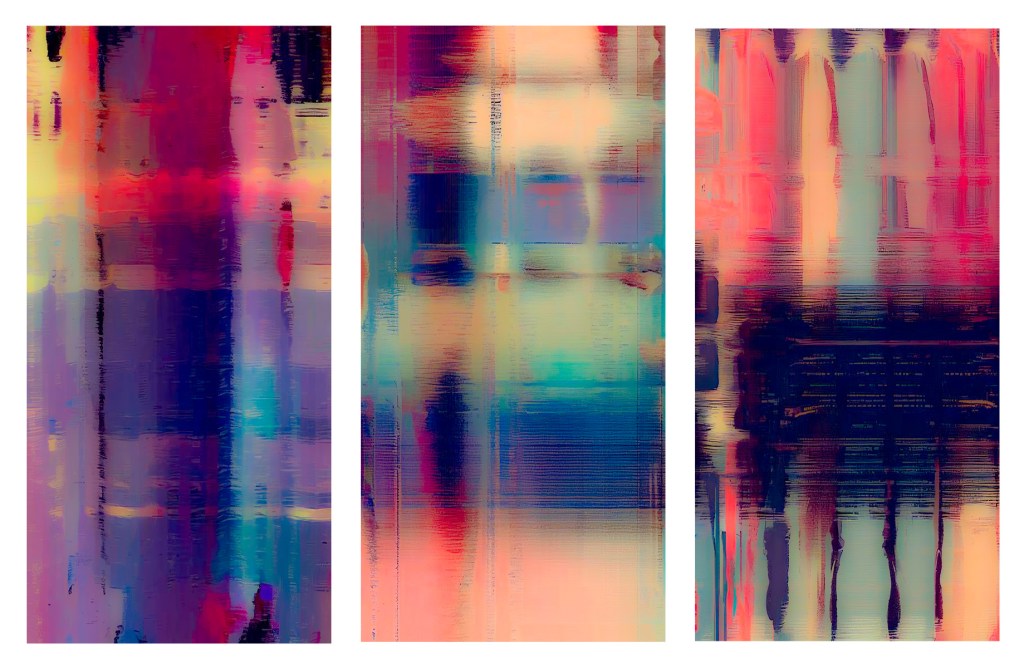
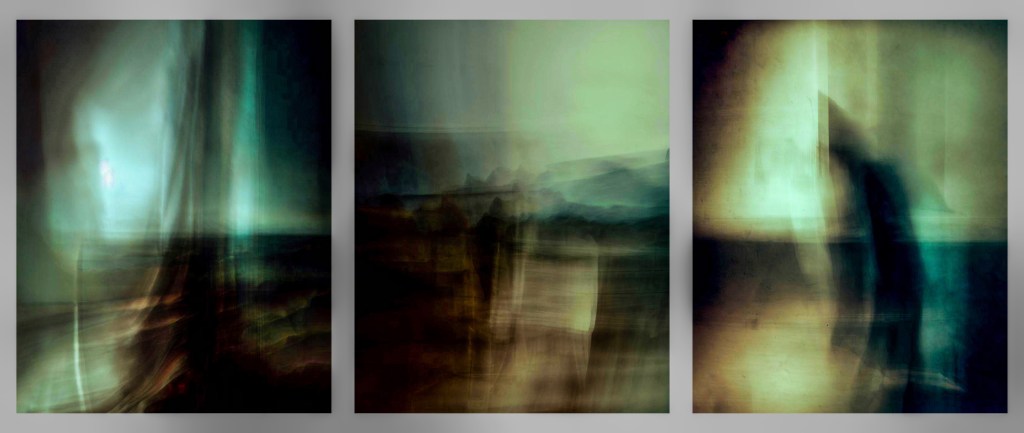
Long Exposure Experiment

My thoughts on long exposure resulted in some abstract work later in the week.

Untitled

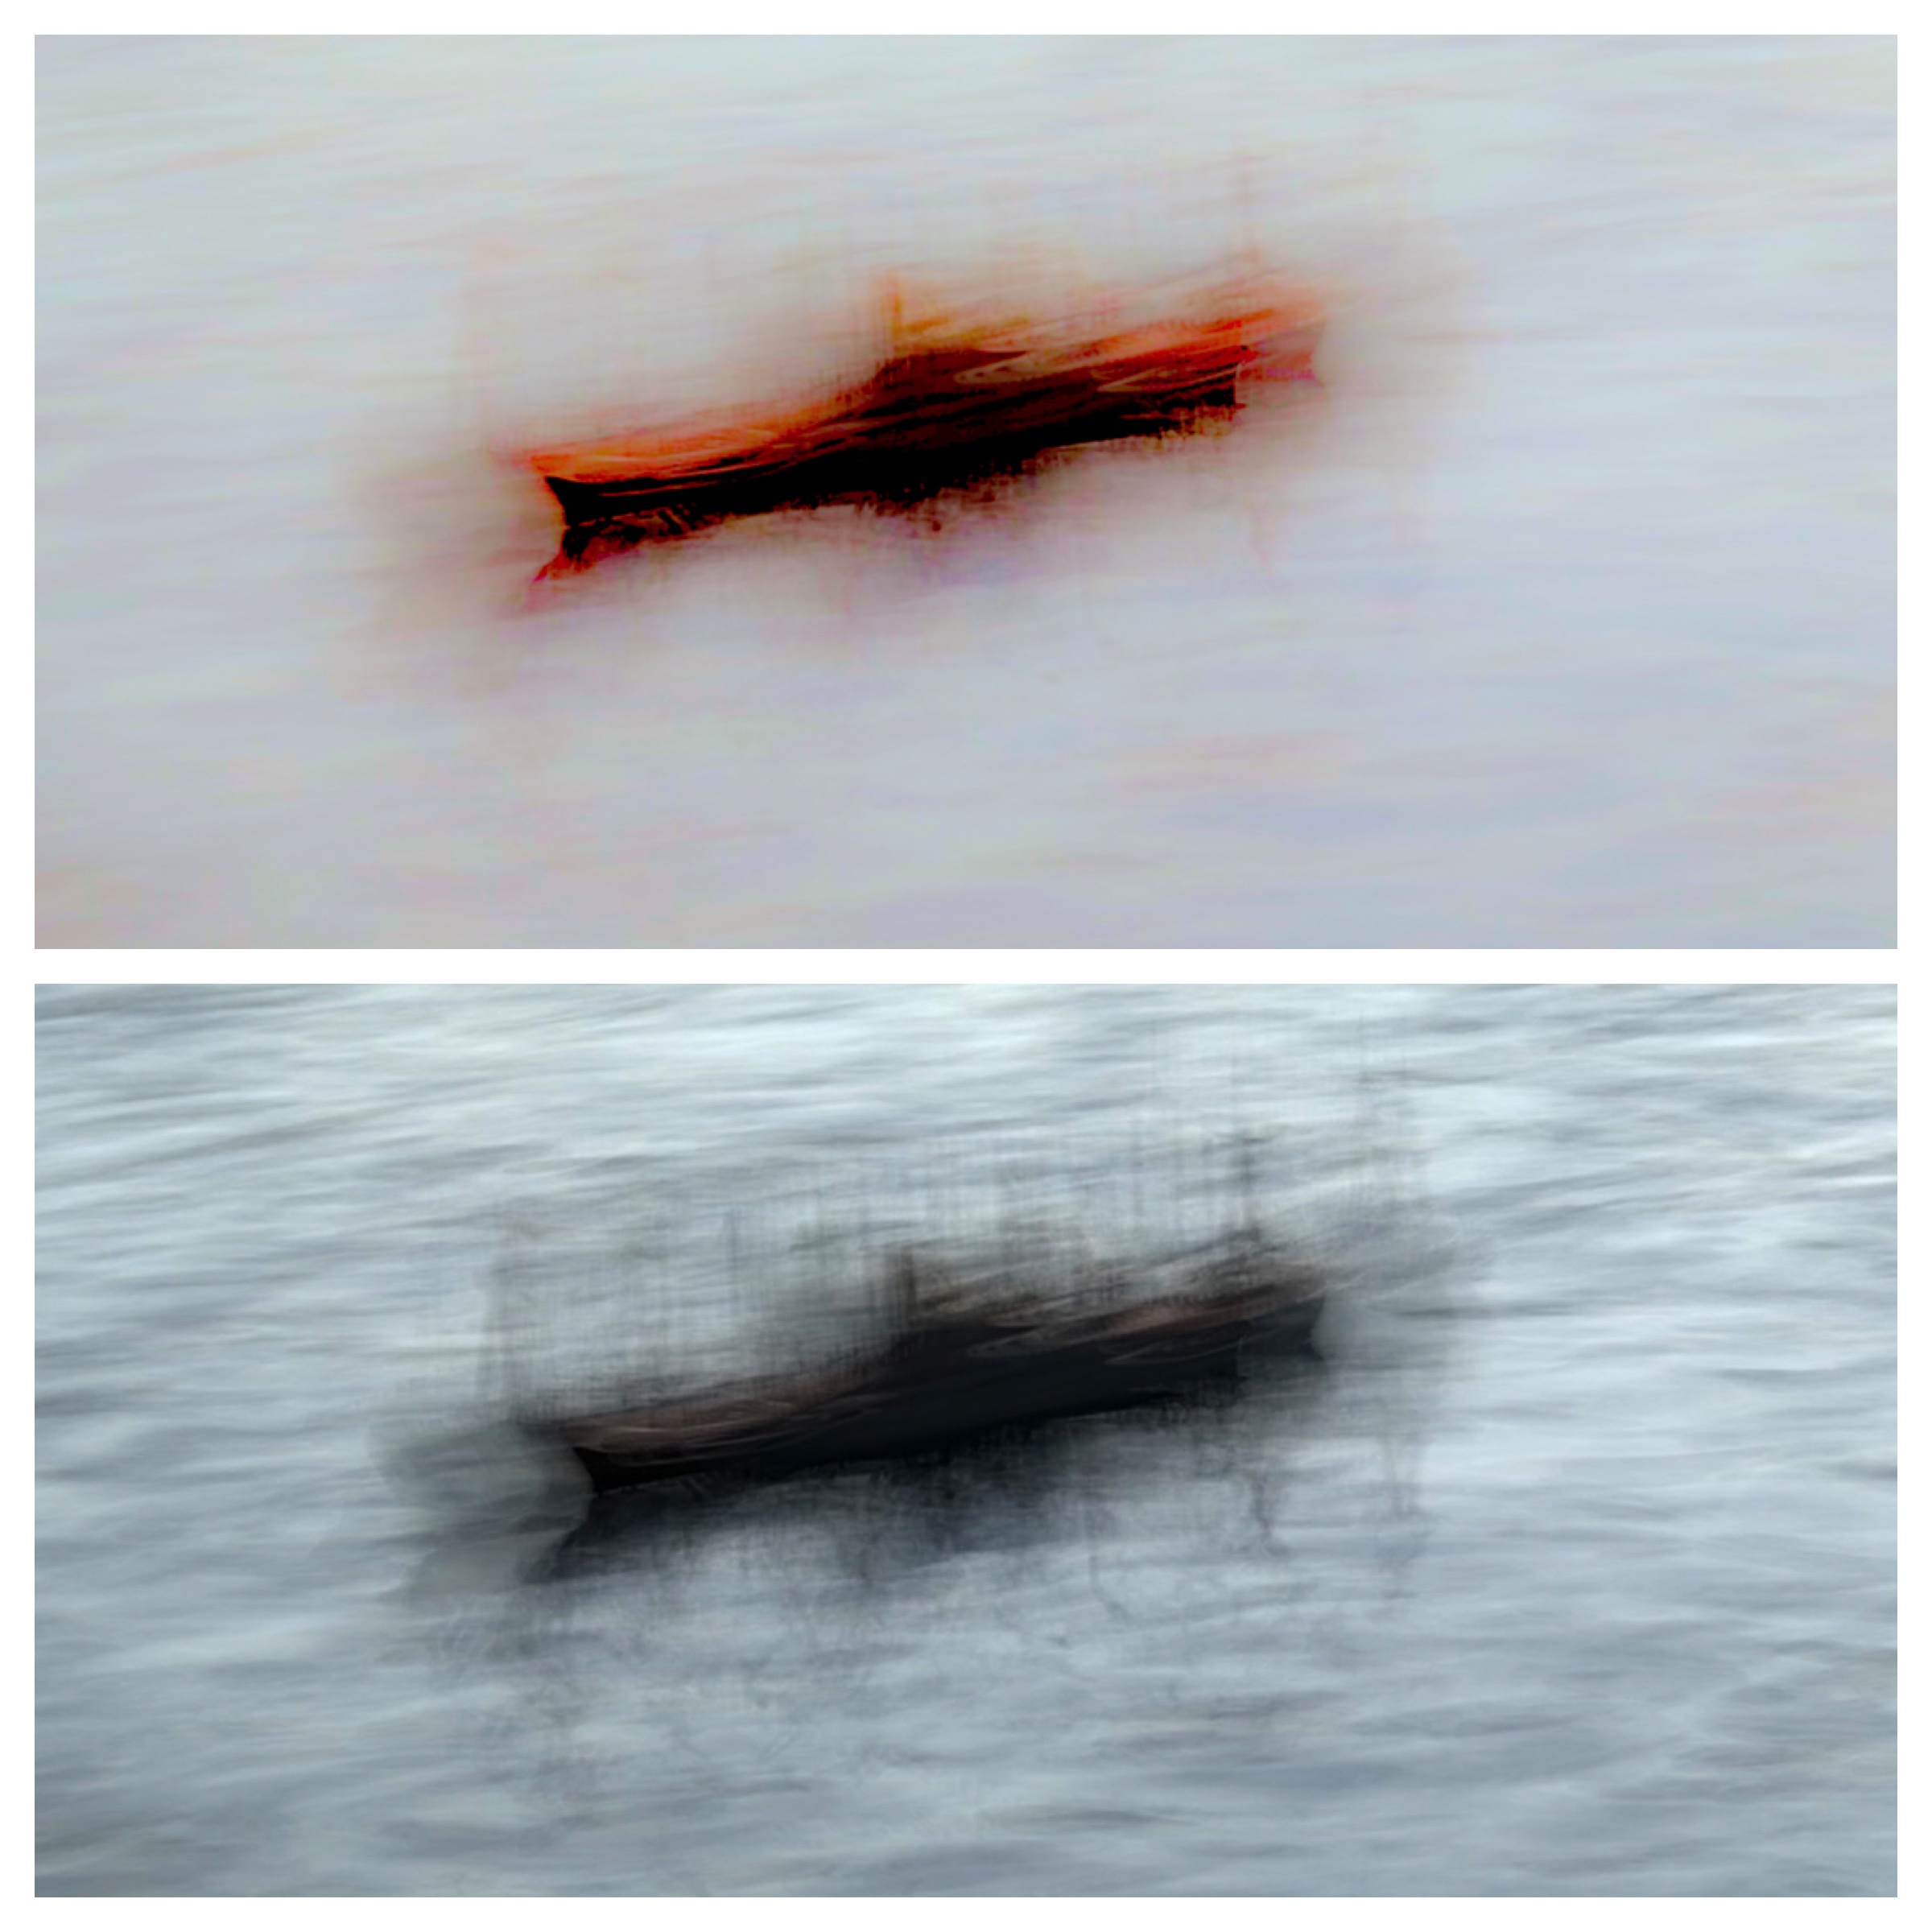
Fig W4 – 2 Long Exposure

IMG_0472

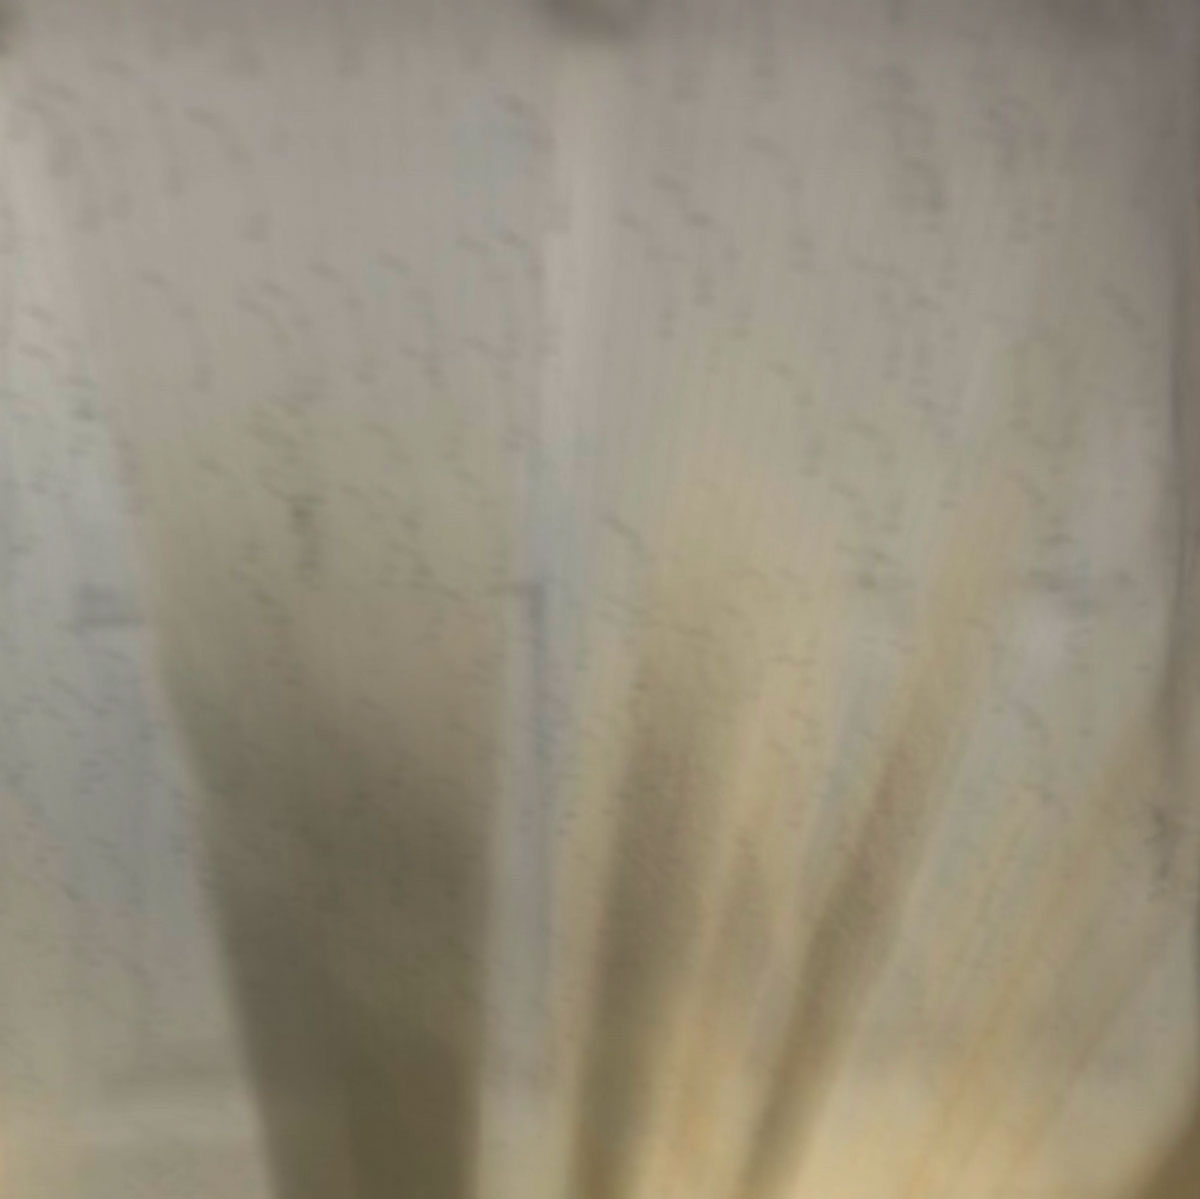
Fig W4 – 3 Long Exposure

I feel this kind of technique could work alongside the Great War theme behind my work. I’ll see if it fits my project or not.

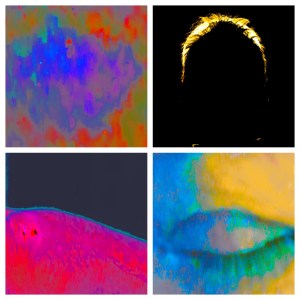
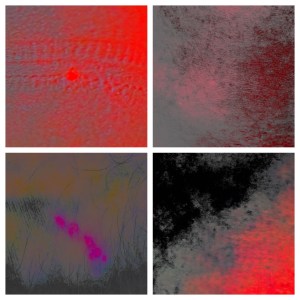
Project Abstract Development

Abstracted images this week adding to the ever growing catalogue of this work.

Abstract Collection

Fig W4 – 4 Abstract Collection

Bottom row – minor trauma / healing abstracted

Top row – experimental abstract images

Week 3

This week I was highly conscious of getting a rush out of recent developments in my work which so far had gone without Tutor or fellow student review. Up until this week I was still challenged by issues affecting the VLE and so the change I made in direction in the last week of the previous module meant I had an increasing investment and increased volume of work that had not been seen or commented upon.

The Digital Posrsibilities challenge using Instagram gave the ideal opportunity to go out to the wider world. This combined with two reviews, a Tutor review and a presentation I gave to the Contemporary Group of the RPS at Regents University. I took the risk and let the world see what I was creating and was fully prepared for all of the feedback.

Fig Wk 3 -1 Early Project Abstracts Reviewed

Developmental comments were gratefully received and were consistent across Tutor review group and RPS Contemporary Group. Whilst a number of the images gain appreciation including via @fotographical at Instagram the trouble is in the complexity arising in talking to the images as scope stretches across commemorative historical, narratives, Scottish regiments, mDNA, X-chromosome.

Development suggestions range from captioning, including some prose or poetry. The main point is the realisation of the need to simplify the intent. A great example is Chloe Dewe Mathews work Shot at Dawn, A straightforward concept everything talked about relates directly back to the title and the pictures are also directly link to the title.

The research behind the work is also substantive and the viewer is left to imagine the persons missing.

Week 2

Past Event Connected through DNA

A significant development occurred only quite late on in my chosen project (in the last fortnight of term).

This was when chance and research led me to link to the past via family DNA. This substantive change in strategy, gives something significant to list in this section of my CRJ blog. I have begun to link past trauma to minor cuts and bruises and bodily repair processes, experimenting with making abstract art from this.

At this stage of writing I only log the development and intend later on to think further on this. The subject is already covered in my recently submitted project proposal August 2018. Events moved rather fast and I reached publication ahead of going through this part of the blog.

I was faced with choosing amongst options that could have overtaken this approach.

Separate Options for Project

I’ll list here the other options and give some of the context as these ideas developed before I abruptly shut them off. It is feasible that the options might become reinstated is one thought but would need to go through a critique process before adoption as the subject matter needs to be appropriate to the  academic course, the MA Photography that I’m taking.

OTNT: Old Town – New Town contrasted with the same for a location on the edge of Metroland.

I had tried to get something going on my Old Town – New Town OTNT work for a town on the edge of Metro-land and another nearby pairing. I did shoot for this and at first found I could almost summarise the work in a single session – of course this would have been hopelessly optimistic but not too far removed, perhaps. I didn’t see the subject extending to a final major project. I was in part put off by discovering a contact who worked as a professional journalist and who had blogged on one half of the subject  I’d arrived at.

Their blog has become fairly inactive and they had no problem with my processing my work even if there is a location overlap.

Emotional Charge

I use this heading to indicate an element I feel has to be in some measure a vital part of my project work and which can carry a toll when intensity is maintained. For the Commemorative Historical project this has proven to be high impact certainly up to the point of introducing the DNA signposting element as I call it which steers the work much more towards the analytical. For the OTNT option the work has not carried any toll and is mostly a photo journalistic in approach. That’s not to say that photojournalism is neutral. Clearly in some circumstances it can carry a great deal of risk or danger.

From practice, in working the Commemorative Historical project, the experience of sustained or recurring emotion does create strain.

As the Commemorative project is heavily loaded emotionally it can create a great feeling of authenticity. The OTNT juxtaposition by comparison lacks the bite.

Sustainability Factors

The Final Major Project needs to be chosen to support ongoing shooting. This can average up to 10 hours per week. This did seem feasible with the OTNT option. All of the subject matter, mainly the locations are close to hand and available to shoot all year round. Shooting schedules can be controlled for outdoor lighting, seasonal or other environmental conditions. By comparison, the original Commemorative work depended heavily on distant location visits in order to build the narrative.

OTNT is more easily sustainable, whilst providing more day to day shooting opportunities.

In the interests of time and knowing I have to complete the original project either within or outside of the MA then I had or was forced to cut down options to create a more intense focus and so stood down further thought of OTNT.

Other Considerations

Another consideration ( and mentioned elsewhere) was being associated with a freelance journalist who already blogs in one of the areas so our work might overlap.

I also felt that a single shoot as already done would characterise the areas fairly well without too much additional shooting be required. Here is an example edit. Images were made in the Positions and Practice module.


A  National Charity Based Locally and a New Way Forward from the Old Town – New Town OTNT Project

OTNT started to develop towards consideration of my embedding, that is working within a national charity based locally. From a period of research conducted earlier out of interest, I could now envisage creating narratives an aspect I’ve grown to accept as an essential part of my proposed work.

Whilst in the interests of time this work was suspended. OTNT had not gone away though and has now moved focus.

During the Assessment Period between Modules, I was able to reconsider this again. In fact, as the charity publicity kept falling before my eyes and an open day was planned that fell happily with my busy routine, I did get to make a next step. On a location visit, I’d planned for a quiet end of the day, I had the great fortune to meet and spend an extended period of time with the marketing manager.

We had a wide ranging discussion around a photographic project I had in mind and almost “had my hand bitten off”. From the reaction, the proposal appealed to them very much indeed and they were very willing to open up avenues of narrative for consideration.

I had also wanted to know the richness of he visual environment (drab browns and dull grass as it happened) and I wanted to learn of any photographic challenges that might be met. With earlier techniques in mind from a museum visit (Perth), I took along my camera, remote release and tripod.

Even with a bright day outside, the workshop environment provided a different challenge to an earlier museum shoot and in a way demanded different kit. I’ve been able to re-assess in part regarding natural lighting and would need to return to try again then if still a challenge I’d need to take in lighting an possibly battery powered to avoid trips on any leads. I might also move over to tethered shooting and use focus stacking to manage DoF.

The Effect of the Camera – Adapting to the environment

The camera had the effect of drawing in an eager helper when really the subject called for slowing down and concentration. This is simply part of photographic life and calls for  tact when there is a need to maintain focus on the task.

Way Forward

I’m now waiting for the start of the new module, and communicated this to the charity. I need time to review this prospect within the MA. I have done a lot of research on operations, and narratives and so on, and naturally I discovered even more on my visit. The keys to progressing this are getting some critique and being able to manage my time when  focussing on project work. There is quite a lot of developmental work I can see being needed for success and in reality as my work evolves there are potentially three projects hanging here in the balance.

Week 2: Research – Contextual

module constraints

My best work, continues to fall down the gaps, as the flashes of creativity experienced  have so far occurred in a natural order, in very close proximity to module start dates but not close enough to qualify for publication. As a continued source of frustration, I’ve tried to slow down in order to coordinate with study module dates.  Potentially, what has happened is that inspiration is drawn from within, without necessarily referencing the Module content, simply due to circumstance

scope

Having got the above out into the open, let me turn to two areas a) the continuing development of practice in Abstract Impressionism, and b) the following up of advice to simply continue shooting, following one’s intuition.

 abstract impressionism

 stage I art

This is the area in which I originally linked  the beauty of the bodily healing processes to soldiers from family who were wounded, and repaired and who repeatedly continued on into battle in the Great War.

Let me see if I can illustrate developments. Originally I’d concentrated on impressions from the battlefield alongside the soldiers perspective on memories of home.  My initial technique  was Conceptual in using relevant images of colour and texture that in my artistic judgement provided scope for post processing into the abstract. I preferred techniques including pixel stretching. Both vertical direction, representational of  the environmental conditions and horizontal, representational of landscape. Then combined there is a layered  intent similar in form to  patterning found in Scottish tartan that might be missed by the viewer but conveniently supports the underlying Scottish theme.

This is just a base level of processing into image layers. These are then recombined with the original image in which line edge effects are enhanced. As required,  layers are hand-painted using masks. The effect I obtained at first I found to be visually stunning. Through planned shooting I had a wealth of relevant images within  my personal catalogue. Overshooting proved necessary as the success rate can be low as not all source images provide enough inspiration for abstraction.

This was the first area of creativity excluded by the course, however the technique was well practised and is available to reuse,. Having said that it does take time to read the base image and  in the application of skill when applying post techniques.  Often, and in favour of the work the techniques are not wholly repeatable. If I worked the same image again the outcome would be different. I like that in this digital age. Although not a deliberate act of destructive editing, practically to resolve this it might take a video recording of the creation process to accurately capture the steps.

 stage II art

This is the next development in abstraction and by chance I discovered that  post-processing colour beta value and applying simplification recreated an effect I’d long ago practised and had enjoyed. As I photograph minor trauma  in relation to mitochondrial DNA as the cellular powerhouse and generational link and do so in terms of  the beauty of bodily healing, I find this technique can work really well in bringing out a healing glow alongside a feeling of layering and looking into the image. I like this direction a lot. One or two images have immediately given this result. As experimentation continued other trauma made for highly saturated representations of colours.  An outcome obtained here is in drawing out areas of interest that the eye alone would miss. The camera records  surface features and layers in post that we  do not ordinarily see. Again there is the same channelling of post processing towards destructive editing.

Two more steps to go. The first  relates to potential garishness in colour saturation which is not readily eliminated. A jury is out for me on this  but I may use this as a signature theme. Otherwise I should experiment in further degrees of subtleness.  In this sense the image continues as a crafted piece of work, which I think adds to its value.

The second step, is possibly fairly intuitive which is to cross, that is combine, stage I and stage II art. In fact this has now been tried, and I like the outcome as it does tone down colour saturation which can overwhelm the senses. In retrospect that could be quite representational of any hurt suffered. The crossing does gives the mellowing effect and refinement I thought I was looking for. Either way there is no loss from learning how to control an image.

technique

There are challenges when photographing even minor trauma not least in my project, is getting relatives onside. As photographer I’m more acutely aware of those minor accidents to self as they can hurt. Now instead of saying ouch and moving on, I immediately go for the camera and as a person my reaction has already been conditioned to this.  The challenge is in photographing when position may be difficult to deal with. There are circumstances where a smartphone camera is ideal yet pixel resolution might show. Turning to macro techniques increases the challenges already faced as equipment becomes cumbersome and unwieldy in the circumstances.  Problem solving though is a key part of photography to be enjoyed, isn’t it?

image audit

Not mentioned thus far, I feel I need to instigate a method of auditing from original file through to abstract. Earlier techniques were non destructive and most of the working could be preserved in saved layers but no longer is this the case. I do need an audit method even if only for my own sanity if publishing later on.

developments in ongoing shooting – the intuitive  part

This topic runs parallel to my project and welcomed as it gives another  frame of comparative reference compared to abstracting images of trauma.

This also hopefully demonstrate I’m active in photography in other ways throughout the current module.

lending support

I had an interlude photographing trees or large shrubs where gravity was getting the better of them, where the intervention of a gardener meant metal supports were provided. I found a temple garden where this was common.  The plants flourished as nature adapted to the support provided. An initial motivation in shooting was around interesting triangular composition. This  evolved to observations of how successful the ways are in which the support was provided. Then I tried to liken this to the support society gives to those in need. Thus a parallel is opened on social or political comment.

The photographs were first pass and as the lighting was strong and contrasty. I would need to return with cloudier skies with more even lighting to obtain the desired exposure.

 national charity engagement

This is an area I previously mentioned in a tutor group and which was viewed as a  good thing in providing a backup project if the current work cannot proceed for one reason or another. It was also advised I be wary of being used as a photographer to the  charities own ends.

Preliminary test shots were made and I was due to go back when the time was right – here note earlier comment about progressing a little too soon.  Meanwhile though, I managed to have a long discussion with one of the volunteers who was very helpful. I’d talked in terms of  continued interest. and during our discussion various narratives unfolded although at least one I’m sure I’d seen in their publicity somewhere.  I gained a broader understanding of how I might embed. without causing interference to the working processes. No further photographs this stage.

Research – Contextual

Write-up responses to what you have seen, read or watched
Reading list: Photography Changes Everything


So really here, some notes to self in ramping up this area of the CRJ. The discussion below leads to a diagrammatic representation when capturing context.

Leaving behind the Positions and Practice Module and moving forward into the second module, Sustainable Prospects, I need to develop this area of the blog.

I had begun with notes I kept in word-processed files and that were made purely for my own interest and as such they were not of a publishable standard without further work. I’ve used the first module to setup a blog and get used to it’s structure and operation which we were allowed to do as the CRJ was not initially a marked assignment where now it is becoming so.

My moving from a scientific and management background into arts education will and has required a period of adaption especially as a number of the terms are unfamiliar, not only as definitions of the scope of what we need to write about, but also as a practice, these are areas that seemed unfamiliar to me, until I stopped to think through what the purpose might be.

I guess in my earlier design work with systems and processes, there is a way of working that entails the creation of a Context Diagram (CORE is an example although it was used for capturing COmmon REquirements). Perhaps at a philosophical level, the thinking approach is not too different between system thinking and the arts? If I proceed with the concepts I know and build on or adapt them for this course as required. It is a way of starting, meaning I can offer something forward and it can be reasonably structured and give Tutors or others scope to decide if my approach satisfies what is normally expected, without my going overboard.

Week 11 Introducing Proposal and Audience

Aid to Understanding Genetic Relations:

Genetics can be a very complex area to grasp. In light of this difficulty, I reference a BBC documentary on the subject.
I watched it several times over a few years back. In video form it provides an explanation of genetics in action as a body under constant invasion, acting in defence and under repair.

www.dailymotion.com/video/x4fjy56

Here also for anyone interested is Wolfram Alpha (a web page – there is also an app) showing how to calculate genetic relationships in this example for my:

great granduncle genetic relation

Click the link, wait for the computation and click more for genetic detail. This has examples and you are invited if you wish to select other relations and compute these.

Original post:

Hello, I’m back again and on my quest to catch up as the course is starting to go well again. I’ve ditched some troublesome IT equipment that was causing me to spend a lot of time resolving technical issues. Many of these were deep and blocked progress. Faults from overheating computer eliminated, I could start on the content of the course.

I guess some students will have found a project that evolves and runs quite nicely. I started off with firm ideas but had these shaken at the foundations. Criticism came from various angles: of photographic theory and academic or general worth.

I make commemorative historical work on my relatives, the Cosh brothers who fought and died in the Great War. The Cosh’s still underpins my work, which has taken on a new direction in:

A) analysing DNA connection. DNA brings a great deal of focus on my father as a living manifestation of these people past. Regards my siblings, in particular, my sisters have a percentage chance of relation, which I do not have. Such is the nature of human biology.

B) in connection with this a strong theme in the Cosh story is of wounding and injury, repair, and dusting down, and going back into battle as many did. I’ve taken this theme and have begun establishing family member DNA analysis and seek to photograph the beauty of our bodily repair mechanism. I then make abstract expressionistic art from the photographs. I shall place these alongside some original photographic work to give contextualisation.

C) in doing this work on behalf of others, I considered my own connection. The Cosh’s are directly in my father’s genetic line. To make my photographic imagery more pertinent, I turned to the maternal ancestral line. I sought out descendant males on my mother’s side. Those again who fought in the Great War. This maintains consistency, and now makes me, in living flesh, a manifestation of these people.

If I am to shake my father’s hand, I am connecting with the last living expression I know of the Cosh brothers. And now my own body biology is not unique within my siblings, an expression of the soldiers and their stories in my Maternal line.

What began perhaps naïvely as a parallel to commando comic portrayal of military endeavour has taken on a more profound significance. My surprise has been the whole aspect of diaspora and the uniting effect this work has on family members, and this has grown in importance.

Of course, my family are an audience for this work, and through the tentative connection, the Black Watch (Highland Regiment) Association has expressed an educational interest, particularly in the academic narrative. There are distant relatives, more connected than I, who migrated to Buffalo, New York State at the beginning of the 20th century, ahead of the war. As they remain unknown to me, there is potential outreach to them.

Finally, though there is a broader educational standpoint on genetics. The technicalities of mitochondrial DNA and X chromosome can be challenging to understand at times. My visual project now serves to illustrate how others might seek out living connection to events in their past. I recognise that many like to leave the past in the past. Personally, I have gained a deep emotional connection with the past. Outcomes within my family, my diaspora, are that of healing and helps us understand who we are and what makes us what we are today.